There are a couple of things to consider before you decide to buy this camera. For one if you want security for your shop or home as long as you have a good reliable WiFi connection or if you prefer running Ethernet cable then you are fine. Although a heads up for the WiFi part. If you are going to use it wirelessly make sure you have enough signal to the area where this camera will be deployed.
Well its pretty self-explanatory. Specially till you get it from online or buy it from store. You will have a box that looks like this.
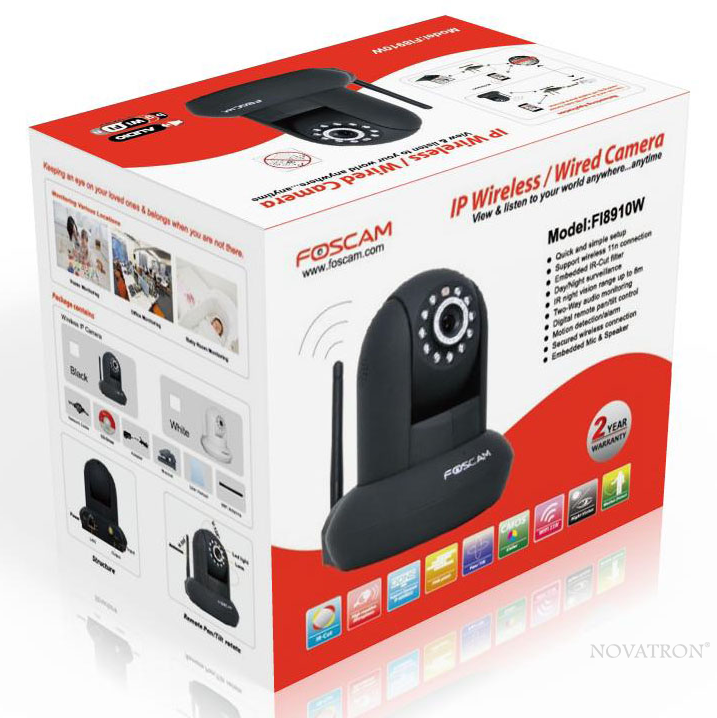
Camera comes with
1. Foscam fi8910w Camera(OBVIOUSLY)
2. TWO YEAR replacement warranty
3. A wall Mounts (Thank God)
4. Power adapter
5. 1 Ethernet Cable
6. Wireless antenna
7. Software/Driver Installation Disk(both for MAC and WINDOWS)
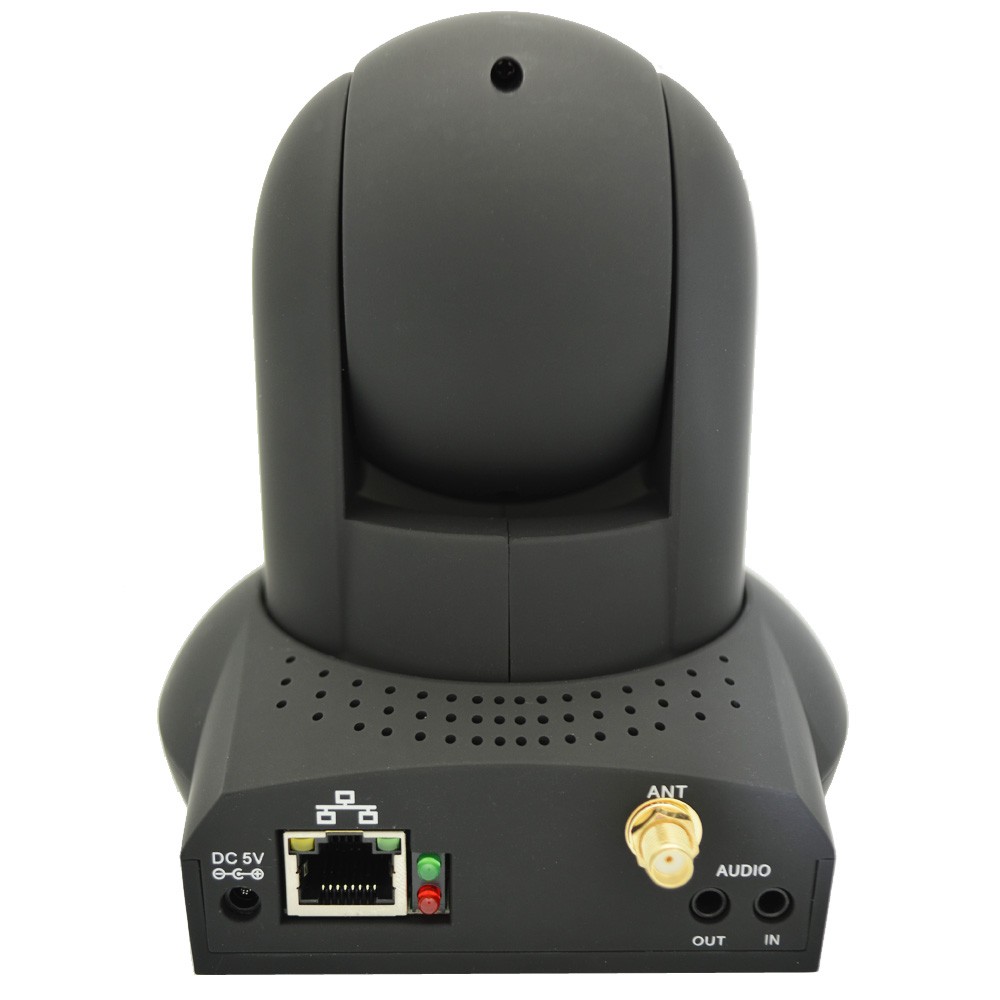
Now the camera looks the same as the box shows. One thing you should know that this camera DOES NOT rotate 360 degree.
FIRST insert the disc into your MAC/WINDOWS Computer and install the software.
If you do not prefer the disc installation method and want to download off of internet you can use this link http://foscam.us/tools-support.html and download the IP Camera Tool PC /IP Camera Tool Mac – MJPEG/New H.264
Once that’s power up your camera and connect it with your router using the ethernet cable.
Then Click on the IP Camera Tool software  that you installed earlier.
It should detect the camera in your network and looks like this
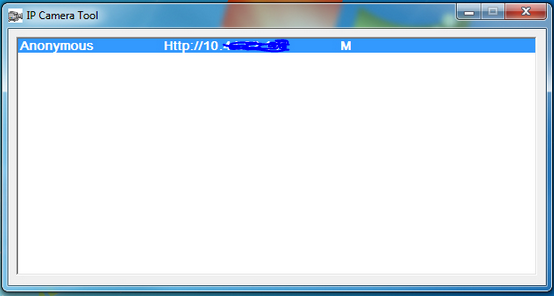
Now double click on the http:// link and it should open up a page in your browser
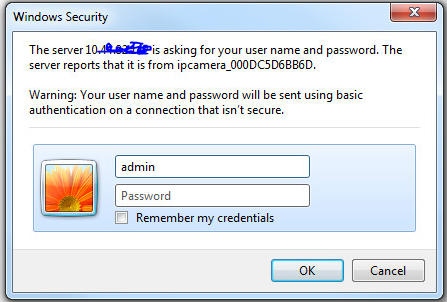
The default username is: admin and there is no password so leave that field empty.
Then once you hit okay this should take you to
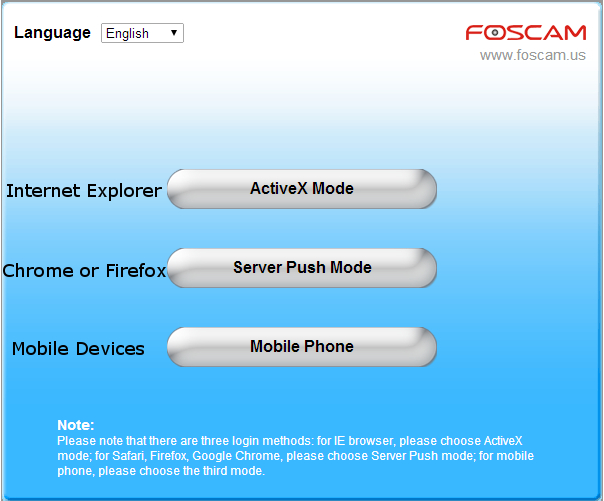
Now like the scree says. If you are using Internet Explorer you should use ActiveX Mode
But if you are using Chrome or Firefox you should use Server Push Mode. Here one thing should be noted that is if you want to use microphone and Speaker on the camera you need to use Internet Explorer ActiveX Mode. And also if you want to do recording you will have to do the same thing. But if you just want to control the camera the way it is. Then Chrome or Firefox will do just fine.
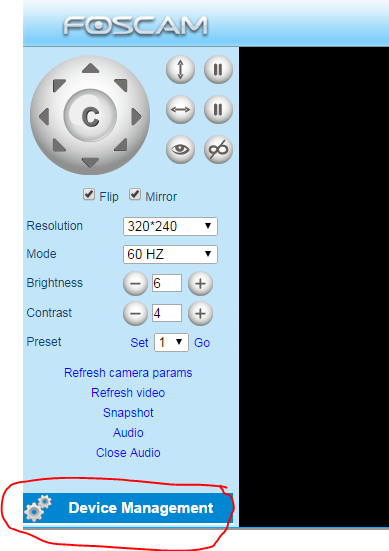
On the next page you click on “Device Management”.
You will see this page
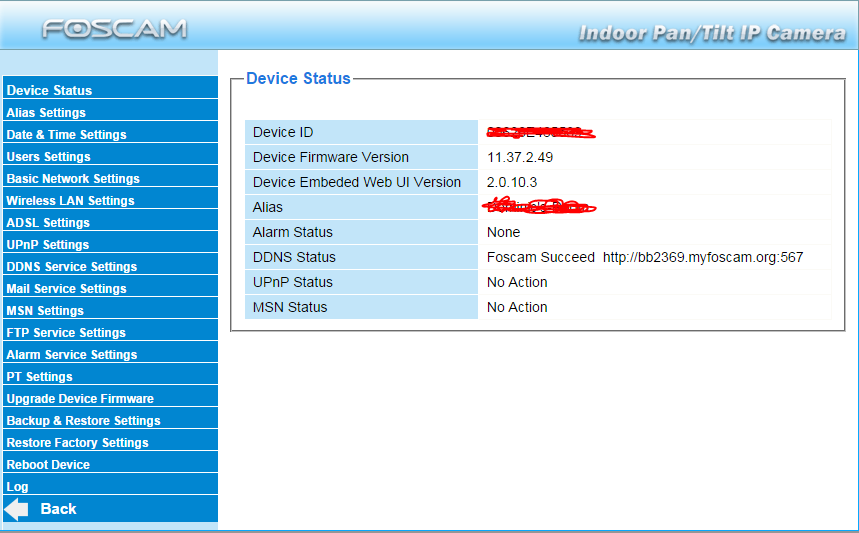
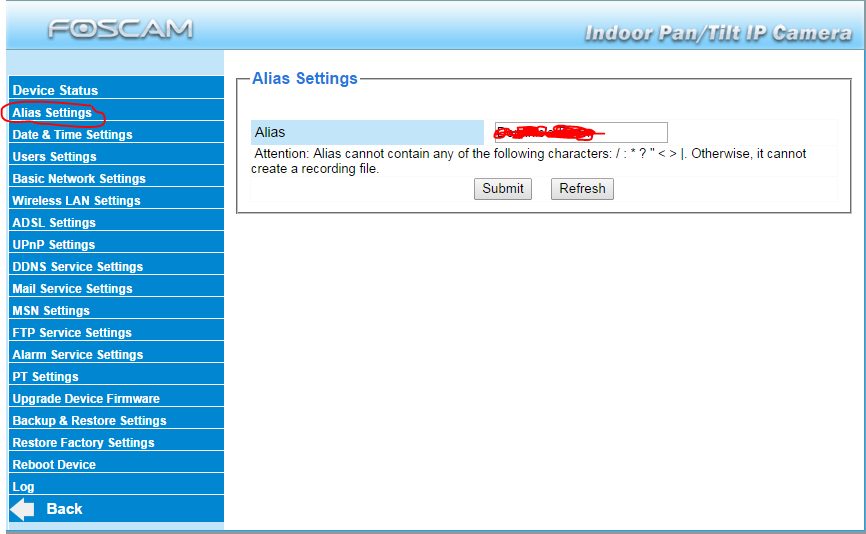
Its a good idea to change the name to something useful. You can do that by clicking on Alias Settings.
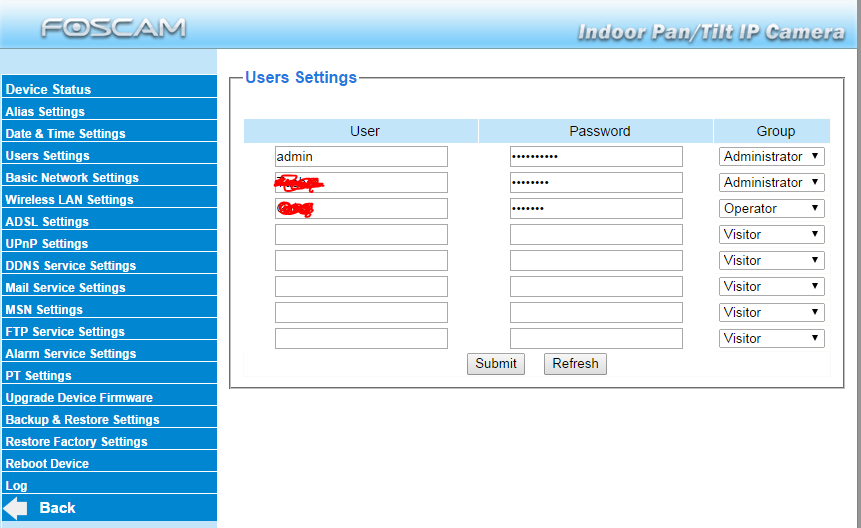
Now click on the “User Settings” and make sure to change your admin password and you can add other users in here and put them in certain group as you like.
Now click on “Basic Network Settings”
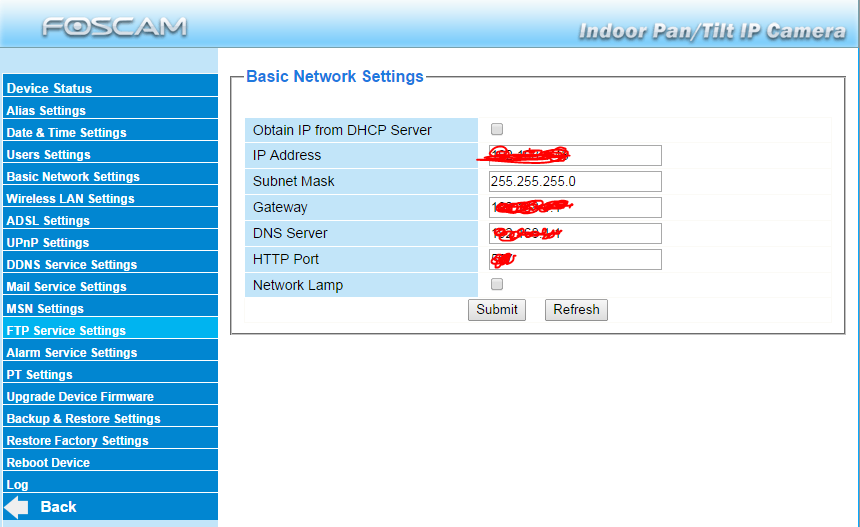
By default the HTTP port will be 80. Its a better practice if you change that to something else. ex: 478.
I was told that you can’t get this cameras to have static IP. But I didn’t really have any issue to specify Static IP for the cameras.
You can actually specify the IP Address you want in this page and hit submit. This will make the camera reboot.
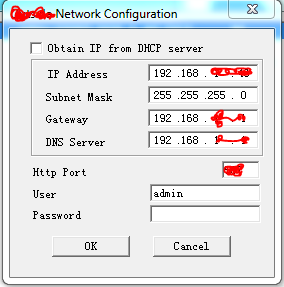
There are another way to change the ip address if you do not want to log into the camera using browser. You can click on the “IP Camera Tool” again and right click on your camera.
Then click on “Network Configuration”
Now back to our browser “Device Management” here comes the Interesting Part. The reason why a lot of people gets this camera because of it being wireless.
Click on “Wireless LAN Settings”
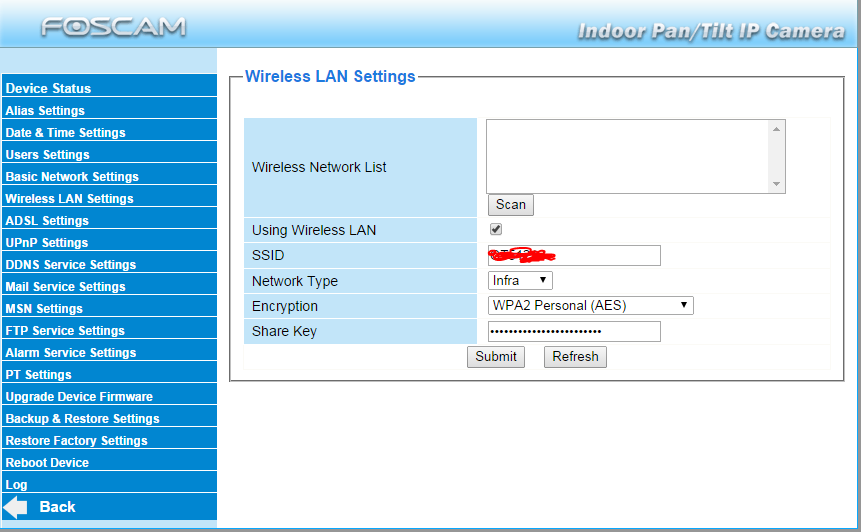
click “SCAN”
After 10 second it should give you the list of the wireless access point around you.
Click on the one that you want to connect to and enter password and hit “Submit”
Now the camera will reboot. Make sure to disconnect the Ethernet cable and give it a minute or 2.
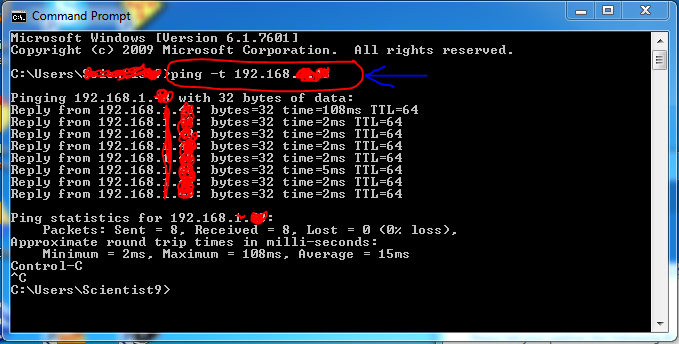
I always use CMD/Command Prompt and do a continues Ping to know if the camera is really connected.
For the people who don’t know how to do it. For windows, Go to START. Type CMD in the search bar. And click on cmd.exe
Then type “Ping -t (whatever the IP address is)”
ex: ping -t 192.168.5.45
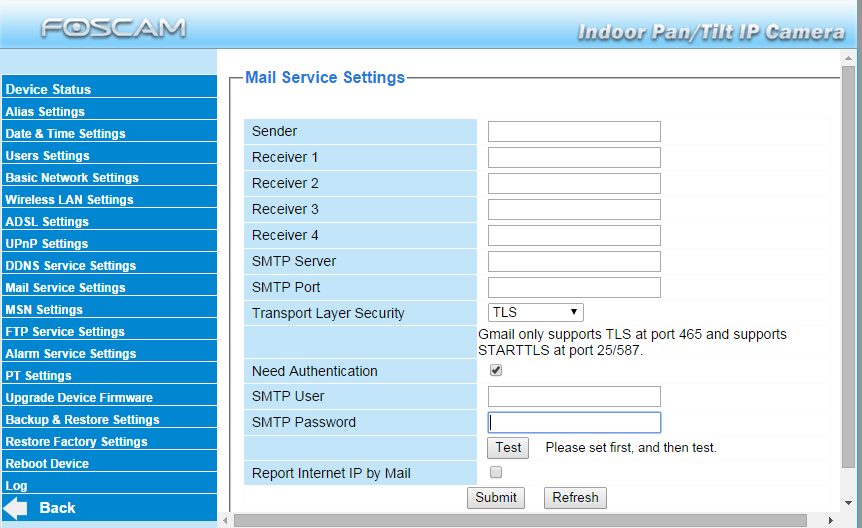
You can setup the camera to send you Mail when a motion or should has been detected.
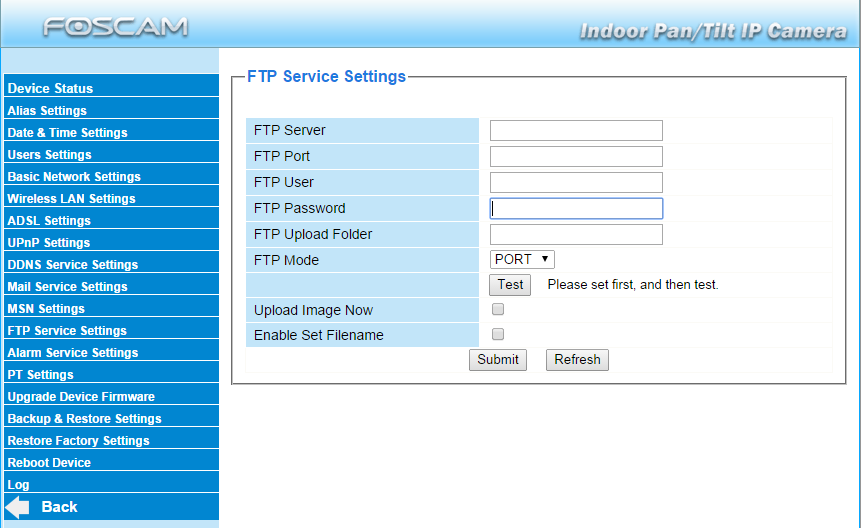
You can also set “FTP Service Settings” which will allow your camera to send picture to the FTP server
For the camera to send you pictures through email and to record in FTP you need to set “Alarm Service Settings”
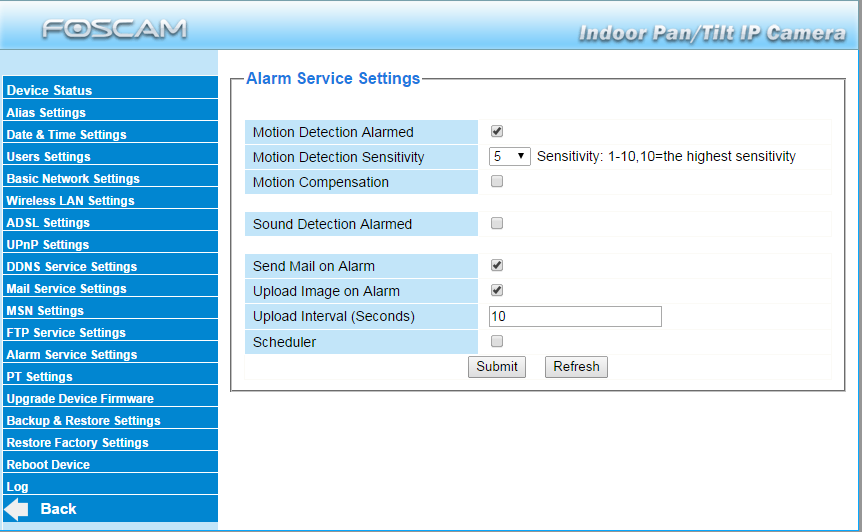
I have set my motion to be 5. Make sure to check mark “Send Mail on Alarm” if you want to get email upon alarm.
Here is one thing that I was not aware of. There are PRESETS on the camera and by default its disabled. To enable them you will have to go to “PT Settings” and uncheck “Disable preset” and submit
What preset does is saves a certain location where the camera is monitoring. So instead of holding the right button to go right somewhere you can save that preset and select the preset number and go. And the camera will go there.
It comes handy in time.
Hope I covered everything. if you have any question feel free to contact me. 🙂
